- Sign into the OMC portal.
- From the left-side menu options, select Members.
- On the Members page, click + Add member.
-
Figure 28: Add Member Button
-
-
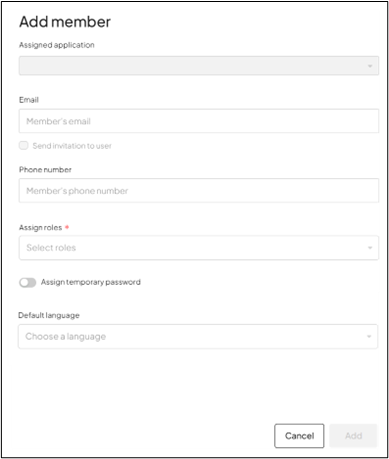
- In the Email field, enter the member’s email address.
-
Figure 29: Add Member Information
-
-
- (Optional) In the Phone number field, enter the member’s phone number.
- Tick the Send invitation to user checkbox if the member has never registered with the application before.
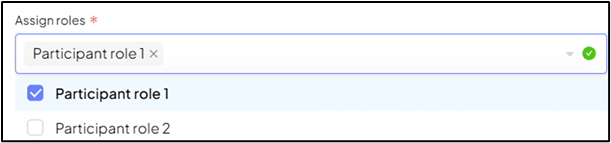
- To assign a role, click the arrow (
 ) to select a role(s) from the dropdown options.
♦Note:
) to select a role(s) from the dropdown options.
♦Note:-
- Ideally, members with an administrative background are assigned administrative roles.
- Roles can be application specific of CIAM-specific roles. CIAM-specific roles are the Managed Org Creator, Org Admin, etc. whereas examples of application-specific roles are: Product Control Manager, Security Manager, etc.
-
Figure 30: Roles Assignment to a Member
-
-
- Enable Assign temporary password.
- Click Generate.
- Click copy (
 ).
).
-
Figure 31: Steps 8 to 13
-

-
- Send the copied password to the member using a messaging service such as MS Teams or Slack.
♦Note: The validity period for a temporary password is 72 hours. If a member does not complete registration within 72 hours then you can generate another temporary password and share it with them out of band.
- Select Default language. This determines the language of the email invitation (e.g. English).
-
- Click Add.
♦Note: For partner organizations using SSO integration, adding the user in CIAM with the correct roles is still required. However, the invitation email does not have to be sent, and the user does not need to complete registration in CIAM (skip steps 6, 8, 9, 10, 11 and 12). In addition to adding the user in CIAM, the user must be assigned to the correct SSO group within your organizations Active Directory solution.

If a member has not accepted their invitation; forgot their password; or is unable to find their original invitation, then follow these steps to resend the invitation email:
♦Note: You can only resend invitations to members whose status is Pending.
- Sign into the OMC portal.
- From the left-side menu options, select Members.
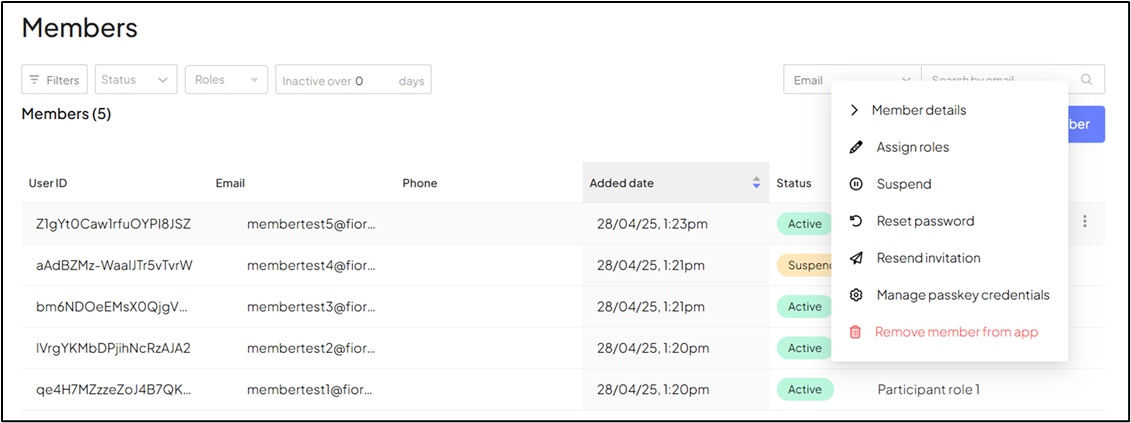
- On the Members page, corresponding to the member to whom you want to resend the invitation to, click more actions
 found at the end of the row.
 - Select Resend invitation.
- Figure 32: Members > Resend invitation option
-
Member’s statuses can be either Active or Pending. This also reflects the status of the member’s invitations. The member’s status remains as Pending until the member accepts the invitation and completes registration. When a member successfully completes registration then their status is automatically set to Active.
Follow these steps to view the status of invitations:
- Sign into the OMC portal.
- From the left-side menu options, select Members.
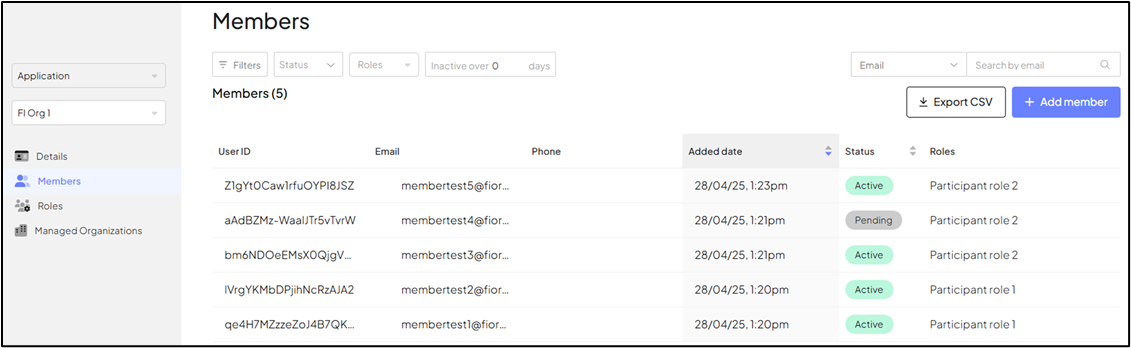
- On the Members page, check the Status column.
- Figure 33: Member’s Status Reflects the Status of Invitations
-
