All roles are related to the application and organization in which the assignment or revocation is performed. For example, if an employee is a member of both CSP and OAS then the role-assignment or revocation in CSP will not be applied to the same member in OAS.
Roles can be application specific of CIAM-specific roles. CIAM-specific roles are the Managed Org Creator, Org Admin, etc. whereas examples of application-specific roles are: Product Control Manager, Security Manager, etc.
Follow these instructions to assign or revoke roles:
- Sign into the OMC portal.
- From the left-side menu options, select Members.
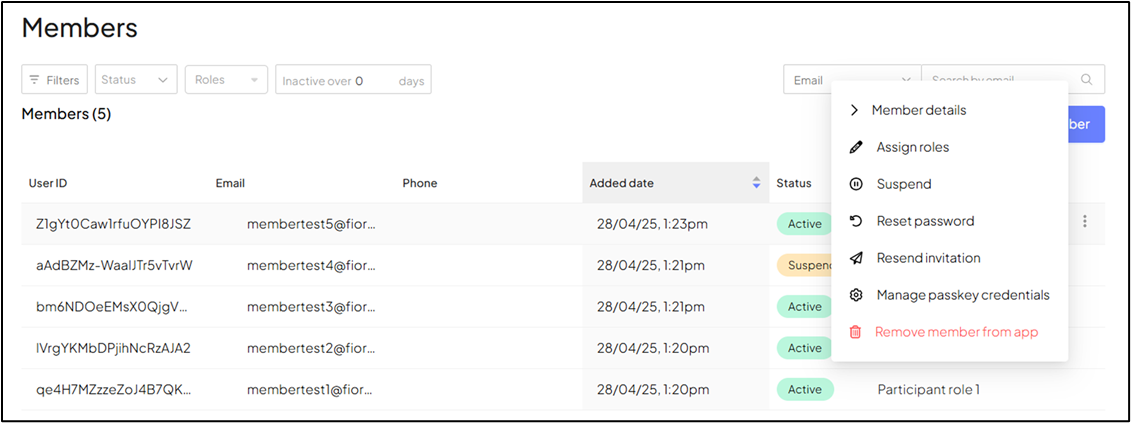
- On the Members page, corresponding to the member to whom you want to assign a role, click more actions
 found at the end of the row.
 - Select Assign roles.
-
Figure 34: More actions > Assign roles option
-

-
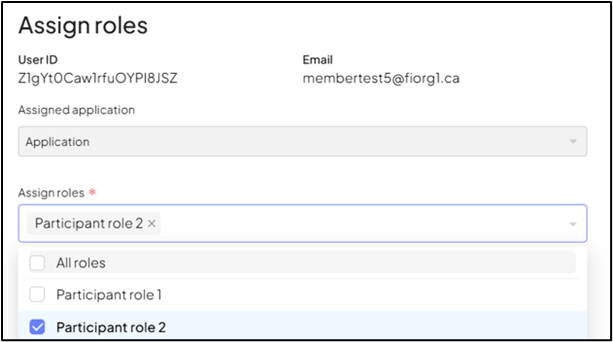
- In the Assign roles pop-up window, check the roles that are to be assigned. Or uncheck the roles to be revoked.
- 💡 Roles use the following naming convention: <application name>_<org type>_<role>
-
Figure 35: Dropdown List of Available and Assigned Roles
-
-
♦Note:
- Regardless of the number of roles and organizations to which a member is assigned, the member can use the same login credentials to access the application.
- When you assign the Org Admin/Managed Org Creator roles to an existing member, you must share the application-specific URL for the OMC portal.
- Click Assign to save changes.
Assign the Managed Org Creator Role
The Managed Org Creator is the only role that requires you to assign both the Managed Org Creator role and the Org Admin’s role to the same member. If you assign only the Org Admin’s role to the member then they cannot add managed organizations, and if you only assign the Managed Org Creator role to a member then the member will not be able to sign into the OMC portal.
You are required to generate and share a temporary password for new members to complete registration. You can also generate a temporary password to assist members who need to reset their password.
Managed Org Creators or Org Admins can create a temporary password and then share it with a member over a messaging service such as Slack or any other means other than by email. Temporary passwords must be shared out of band.
Follow these steps to generate the temporary password:
- Sign into the OMC portal.
- Select Members from the left-side menu options.
- Corresponding to the member for whom you want to generate a temporary password, click more actions found at the end of the row.
- Select Reset password.
-
Figure 36: More Actions > Reset Password
-

-
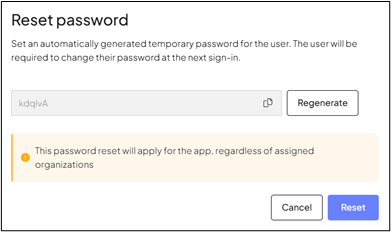
- In the Reset password pop-up window, click Generate.
- Click copy (
 ).
).
-
Figure 37: Copy Icon When Generating a Temporary Password
-
-
- Send the copied password using a messaging service such as Slack to share the temporary password.
-
♦Note: If you do not know what the validity period for the temporary password is then you will need to reach out to Interac. Generally, the validity period for a temporary password is 72 hours. You can share this timeframe with the member when you share the temporary password.
-
- Click Reset.
As part of the account creation / user registration process, members will be able to register a passkey on their mobile device. This passkey can then be used as their 2nd factor for authentication (instead of password).
Members are not able to “reset” their passkeys on their own and will need Admin support. A user may need to register a new passkey in the event they lose access to the device where they originally stored their passkey (for example, if they have replaced or lost their previous device).
Follow these steps to help members register a new passkey.
- Sign into the OMC portal.
- Select Members from the left-side menu options.
- Corresponding to the member for whom you want to generate a temporary password, click more actions found at the end of the row.
- Select Manage passkey credentials.
-
Figure 38: More Actions > Manage passkey credentials
-

-
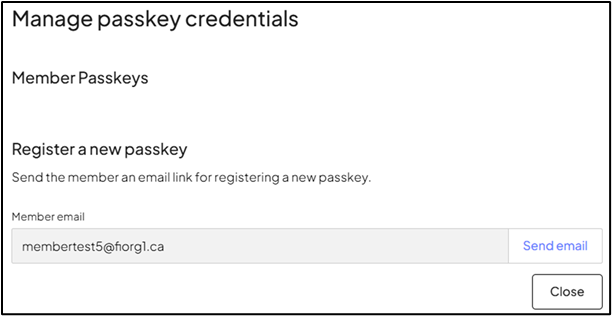
- In the Manage passkey credentials pop-up window, click Send Email.
- This will send an email link to the user’s mailbox. Clicking the link will request the user to login. Upon successful login, the user will be able to register a new passkey as they did before in account creation / user registration process.
-
Figure 39: Send Email (to help a User Register a New Passkey)
-
When a member is removed from an application, only the member’s access is removed. The data created by that member within the application is handled by the application and its environment and not by Transmit.
Follow these steps to remove a member from an application :
- Sign into the OMC portal.
- From the left-side menu options, select Members.
- A table lists existing Members and their important information such as members’ name, ID, phone number, added date, status (whether active or pending), and roles.
- In the table, corresponding to the member you want to remove, click the more actions found at the end of the row.
- Select Remove member from app.
-
Figure 40: More Actions > Remove Member From App
-
-
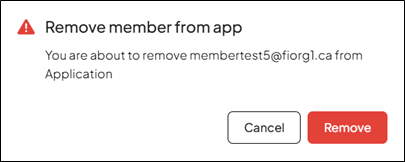
- Click Remove in the confirmation pop-up window.
-
Figure 41: Member Confirmation Pop-up Window
-
Follow these steps to suspend (disable) access or to activate (enable) access for a suspended Member :
- Sign into the OMC portal.
- From the left-side menu options select Members.
- On the Members page, corresponding to the member to whom you want to suspend or activate, click more actions found at the end of the row.
- Select Suspend or Activate.
- The Suspend option will only appear for members with “Active” or “Pending” status. Once Suspend is selected, the status for the member will change to “Suspended”.
- The Activate option will only appear for members with “Suspended” status. Once Activate is selected, the status for the member will change to “Pending”.
-
Figure 66: Members > Suspend
-

Figure 67: Members > Activate
